How To Vacuum A Swimming Pool – Complete Guide
To vacuum your swimming pool effectively, first assemble the vacuum head, telescopic pole, and hose, making sure all the connections are airtight. Submerge the hose fully to get rid of any air bubbles. Then, attach it securely to the skimmer or suction port using the vacuum plate.
Next, adjust the valves to boost suction. Start from the shallow end and use slow, overlapping strokes to clean both the floors and walls.
After you’re done, check and maintain your filter and equipment to keep everything working at its best. Following these steps closely will guarantee clear water and help your pool last longer. Want to learn more? Keep exploring to master these steps!
Why Vacuuming Your Pool Is Essential for Clean Water
Although it might seem like a simple chore, vacuuming your pool regularly plays a vital role in maintaining clean water by preventing organic debris from accumulating and disrupting pH and chlorine levels.
By focusing on thorough debris removal, you guarantee balanced water chemistry, which is fundamental for effective sanitization.
Vacuuming also reduces algae growth and staining on pool surfaces, preserving both aesthetics and hygiene.
Consistent vacuuming minimizes sediment buildup, enhancing swimmer comfort and preventing cloudy water.
Plus, removing debris before it reaches your filtration system reduces strain on the equipment, extending its lifespan and maintaining peak performance.
After storms or heavy use, vacuuming becomes even more important to maintain water clarity and avoid visible contaminants.
What Tools You Need to Vacuum Your Pool Effectively
To vacuum your pool effectively, you’ll need a few key tools that match your pool’s surface and size. First up, get a vacuum head that works well with your pool type.
Next, grab an adjustable telescopic pole—that way, you can reach every corner without straining. You’ll also need a flexible hose to connect the vacuum head to your skimmer or suction port.
Oh, and don’t forget the vacuum plate! It helps secure the hose connection so everything stays in place.
Before you start vacuuming, use a pool brush to loosen up any debris stuck on the walls or floor. That’ll make your vacuuming much easier and more efficient.
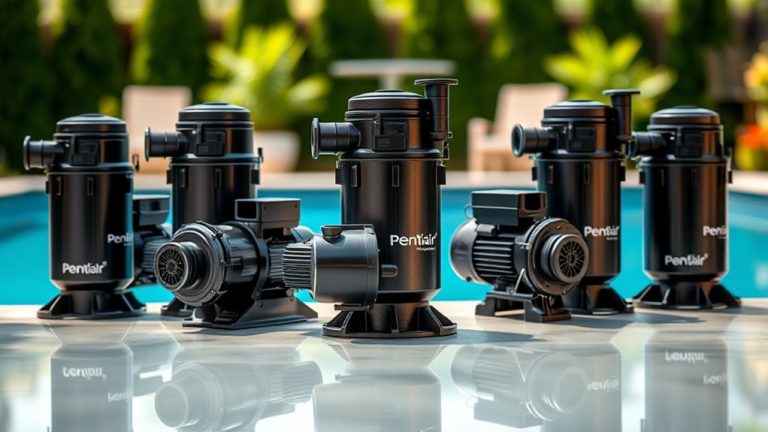
Essential Vacuum Equipment
Vacuuming your pool effectively requires a specific set of tools designed to target debris at every level.
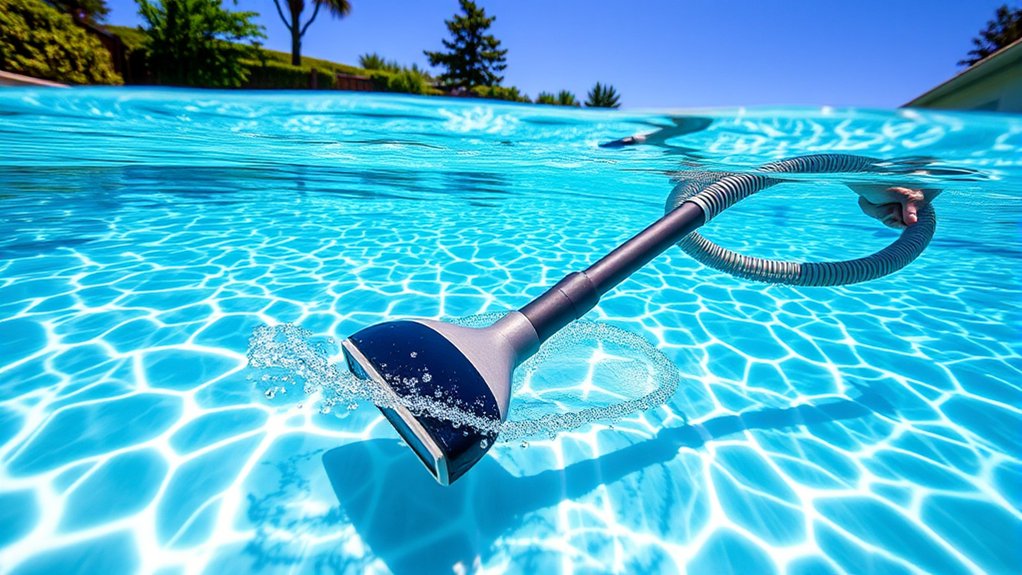
Start with a vacuum head engineered to attach securely to your telescopic pole and optimized for your pool’s surface, whether vinyl, tile, or fiberglass. The telescopic pole adjusts in length, enabling you to reach all pool areas without entering the water.
This ensures thorough cleaning from shallow to deep ends. Connect the vacuum head to the skimmer or suction port using a flexible vacuum hose, which transports debris and water efficiently.
This triad—vacuum head, telescopic pole, and vacuum hose—forms the backbone of your pool vacuum system. It allows precise maneuvering and effective debris removal for a spotless pool floor every time you clean.
With these tools, your pool maintenance becomes much easier and more efficient.
Choosing The Right Tools
When selecting tools to vacuum your pool effectively, you’ll need equipment designed for both compatibility and efficiency. Start with a vacuum head that matches your pool’s surface, whether tile, vinyl, or concrete. This will guarantee thorough debris removal.
Attach it to a telescopic pole so you can reach every corner without getting into the water. Your vacuum hose should be flexible and long enough to connect the vacuum head to the skimmer or suction port. This allows smooth debris flow.
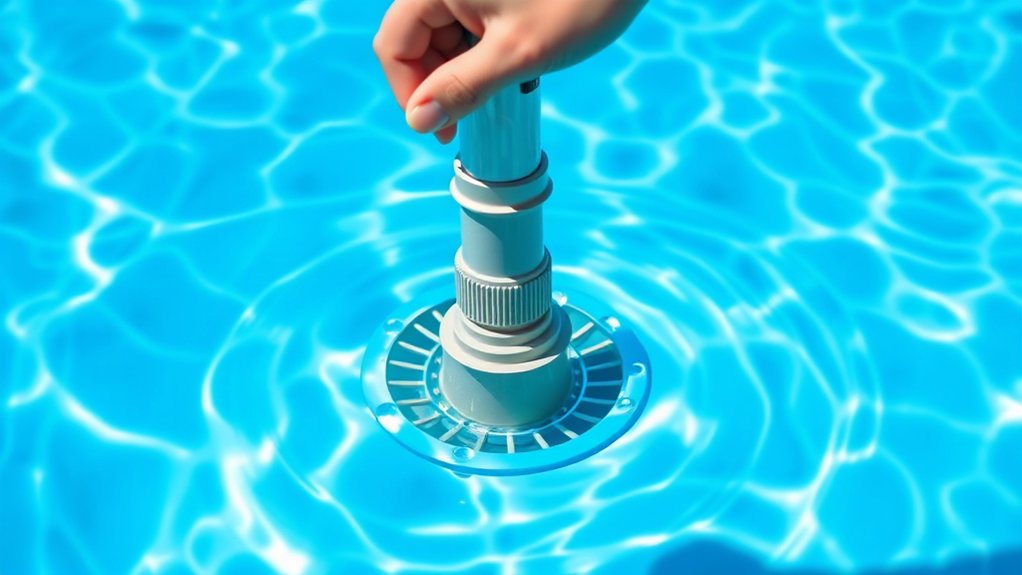
Use a vacuum plate to secure the hose to the skimmer basket. This way, you avoid having to remove the basket during cleaning.
Before vacuuming, grab a pool brush to loosen dirt and algae on walls and floor surfaces. Doing this boosts the vacuum head’s performance and ensures a complete clean.
How to Assemble and Set Up Your Pool Vacuum
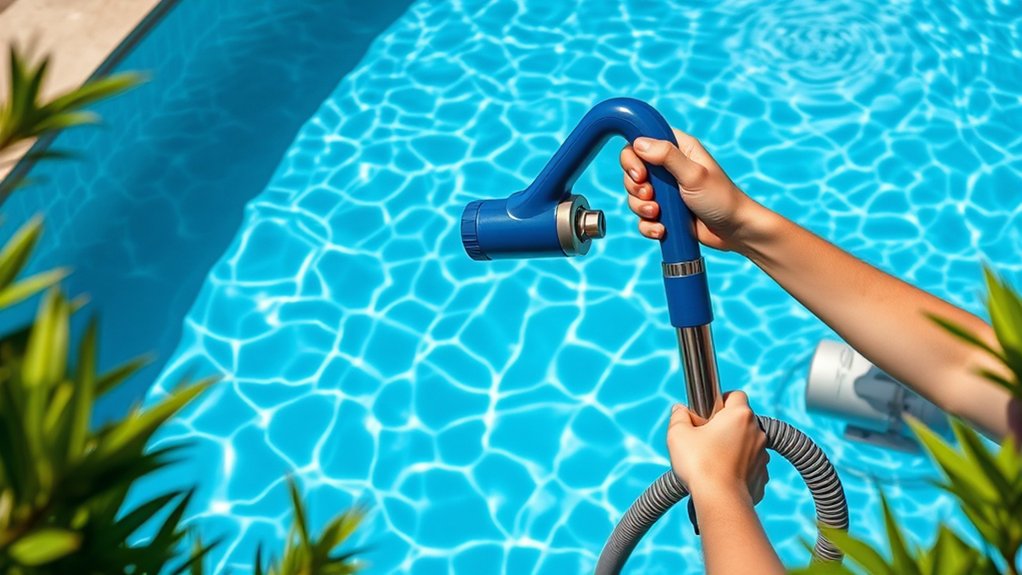
Start by firmly attaching the vacuum head to the telescopic pole so it fits securely.
Then, connect the vacuum hose to both the head and the skimmer or vacuum port.
Make sure to fully submerge the hose in the water to get rid of any air bubbles.
Finally, adjust your filtration valves to maximize suction, and then lower the vacuum into the pool to begin cleaning.
Equipment Assembly Steps
To assemble your pool vacuum efficiently, begin by securely attaching the vacuum head to the telescopic pole. Make sure you get a tight fit—that way, the cleaning will be more effective.
Next, connect one end of the hose firmly to the vacuum head to avoid air leaks, which can reduce suction.
Now, submerge the vacuum head into the pool while holding the hose vertically. This fills the hose with water and pushes out any trapped air, which is essential for the vacuum to work properly.
After that, attach the hose’s free end to the skimmer suction line or the dedicated vacuum port. Be sure to tighten all connections to keep the suction at its best.
Finally, inspect every component to make sure everything is secure and check for leaks before you start vacuuming. Setting up your equipment properly not only guarantees efficient debris removal but also helps prolong the life of your vacuum.
Vacuum Hose Preparation
Three key steps guarantee your vacuum hose is properly prepared for efficient pool cleaning. First, securely attach the vacuum head to the telescopic pole.
Next, connect one end of the vacuum hose to the vacuum head, making sure of a snug fit to avoid air leaks. Then, fully submerge the hose in the pool, letting water displace trapped air for maximum suction.
Finally, attach the hose’s free end tightly to the skimmer or vacuum port. Before starting, check all connections for leaks and stability.
| Step | Action | Purpose |
|---|---|---|
| Attach vacuum head | Secure to telescopic pole | Stability during cleaning |
| Connect hose end | Snug fit to vacuum head | Prevent air leaks |
| Submerge hose | Fill with water, expel air | Guarantee effective suction |
How to Prime the Vacuum Hose and Remove Air
Before connecting the vacuum hose to the skimmer or suction port, you’ll need to prime it by filling the entire hose with water to eliminate air pockets.
Start by fully submerging the vacuum head in the pool while holding the hose vertically. Gravity will help the water flow down the hose, pushing out air pockets.
Watch carefully for bubbles as you lower the hose’s end into the water. Bubbles mean there’s trapped air that must be expelled.
Next, place the free end of the hose over a return jet to force water through the hose. This makes sure any remaining air is purged.
Proper priming is essential because air pockets reduce suction efficiency. This can really hinder how well the vacuum works.
How to Connect the Vacuum to Your Pool’s Skimmer or Port
Start by removing the skimmer cover and firmly inserting the free end of the vacuum hose into the skimmer suction line. Make sure the connection is airtight to prevent suction loss.
Before connecting, fully submerge the vacuum hose and head in the pool to expel trapped air. Air leaks can drastically reduce skimmer suction efficiency, so this step is important.
Fully submerge the vacuum hose and head to remove air, ensuring optimal skimmer suction efficiency.
If your skimmer requires a vacuum plate, install it to connect the vacuum hose without removing the basket. While positioning the hose, cap its free end to block air intake, then quickly submerge it to maintain prime.
Make sure the hose fits snugly to avoid air leaks, which can compromise suction and cleaning performance. Proper connection is critical.
A secure, airtight link between the vacuum hose and skimmer suction guarantees effective debris removal during pool vacuuming.
How to Adjust Valves for Better Suction
Once you’ve secured the vacuum hose to the skimmer line, you’ll need to fine-tune the valves to maximize suction. Properly adjusting valves redirects flow, increasing suction at the skimmer and improving debris pickup efficiency.
Focus on the skimmer valve nearest the pump; partially closing other intake valves channels more suction power to the vacuum line.
Keep the main drain valve either fully closed or set to balance suction per your pool’s design. Always adjust valves while the pump runs to immediately assess suction changes.
Partially close other intake valves to boost skimmer suction. Prioritize adjusting the skimmer valve closest to the pump.
Monitor suction strength consistently during vacuuming. Confirm the main drain valve’s position aligns with suction needs. Make valve tweaks with the pump operating for real-time feedback.
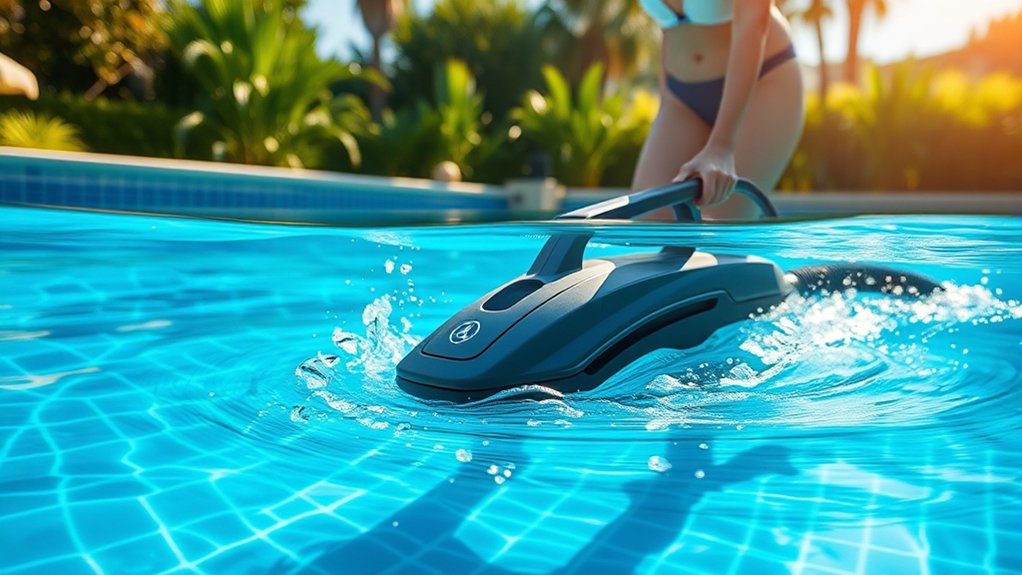
How to Vacuum Your Pool Floor and Walls
Begin vacuuming your pool by working systematically from the shallow end toward the deep end. This helps prevent debris from drifting back into areas you’ve already cleaned. Use slow, overlapping strokes with the vacuum head to cover both the pool floor and walls thoroughly.
Before vacuuming, brush the walls to dislodge debris. This simple step makes manual cleaning much more effective. Regularly check the vacuum head for blockages or streaks, and adjust the suction valves to maintain the right power.
Doing this ensures you remove debris efficiently without wasting time or effort. It’s all about working smart so your pool stays clean with less hassle.
| Task | Action | Tip |
|---|---|---|
| Start Position | Shallow end | Prevent debris drift |
| Vacuum Technique | Slow, overlapping strokes | Cover floor and walls |
| Maintenance Check | Inspect vacuum head and suction | Adjust as needed |
Cleaning Up After Vacuuming and Maintaining Your Pool Equipment
Inspect your pool’s filtration system right after vacuuming to remove any debris and keep everything running smoothly. Debris buildup can really slow things down and put extra strain on your filter system.
Start with these key cleaning steps: backwash the filter if the pressure gauge goes up because that usually means it’s clogged. Also, clean out the skimmer basket to get rid of debris that blocks water flow.
Begin by backwashing the filter when pressure rises and clearing the skimmer basket of debris.
Don’t forget to check and clean the pump strainer too, as this helps prevent motor damage.
Make sure to remove and rinse all the vacuum parts thoroughly to avoid any leftover residue. Once everything is clean, carefully put all the equipment parts back together. This way, you’ll keep your pool ready to go and help your gear last longer.
Keeping up with these simple tasks stops debris from piling up, makes sure your filtration works well, and extends the life of your pool equipment.
Cleaning properly after vacuuming is key to good pool maintenance and smooth operation.
Frequently Asked Questions
How Often Should I Vacuum My Pool During the Swimming Season?
You should vacuum your pool at least once a week during the swimming season to guarantee ideal pool maintenance.
Use proper vacuuming techniques, moving slowly to capture all debris and prevent stirring up dirt.
Increase frequency after heavy rain or parties for effective seasonal cleaning.
Adjust based on environmental factors like nearby trees or wind.
Regular vacuuming helps maintain water clarity, reduces algae growth, and extends your filtration system’s lifespan.
This keeps your pool in top condition.
Can I Vacuum My Pool if the Water Is Cloudy?
You can vacuum your pool even if the water is cloudy. Did you know that up to 70% of the cloudiness comes from tiny organic particles?
Start by testing and balancing the chemicals to tackle the causes of cloudy water.
Use vacuuming techniques like a fine mesh bag to trap small debris effectively.
Make sure to run your pump continuously during and after vacuuming to boost filtration.
These pool maintenance tips will help restore clarity and keep your pool sparkling.
What Should I Do if My Vacuum Hose Keeps Losing Suction?
If your vacuum hose keeps losing suction, start with some hose maintenance tips. Fully submerge the hose to remove any air pockets.
Also, check all the connections for leaks or loose fittings.
Next, follow some suction troubleshooting steps. Take a look at your filter system to see if there’s any debris caught inside.
Adjust any valves you find to optimize the flow.
These common vacuum problems usually come from air leaks or clogged filters.
And don’t forget to make sure your pool pump is running properly—it plays a big role in keeping consistent suction power.
Is It Safe to Vacuum the Pool With Children Swimming?
It’s not safe to vacuum the pool with children swimming because of swimming hazards and suction risks. Always prioritize pool safety by making sure kids are supervised. Keep children out of the water while you’re vacuuming.
If you have to vacuum with children nearby, keep a safe distance between them and the vacuum equipment. This helps prevent any chance of entrapment. Using an automatic vacuum can reduce the hazards.
But no matter what, always teach children about pool safety. Make sure they understand the dangers involved when the pool is being cleaned. That way, everyone stays safe and can enjoy the pool.
How Do I Store My Vacuum Equipment in the Off-Season?
Picture your vacuum gear neatly coiled and sparkling in a cool, dry nook. For winter storage tips, start with a thorough vacuum maintenance checklist: clean all parts, check for damage, and fix issues.
Use equipment organization solutions like labeled bins for accessories and protective bags for poles to avoid scratches. Coil hoses carefully to prevent kinks.
This methodical approach not only keeps your gear pristine but also guarantees smooth operation next season.
Conclusion
Vacuuming your pool is like giving it a refreshing boost. It’s essential for crystal-clear water and a healthy swim. Using the right tools, properly assembling your vacuum, and adjusting valves for peak suction helps you remove dirt from every corner.
Remember to clean up and maintain your equipment afterward. This keeps everything running smoothly. Just follow these steps carefully, and your pool will stay sparkling and ready for endless enjoyment.